

Before a single rack gets moved or a new conveyor belt is installed, the real work of optimizing a warehouse happens on paper—or, more likely, on a screen. For any food bank, government agency, or 3PL involved in food-grade operations, your layout isn't just about storage. It's the physical blueprint of your entire strategy.
A great layout dictates efficiency, ensures food safety, and keeps you compliant. Getting it wrong early on creates costly bottlenecks and can seriously jeopardize your ability to deliver on promises to the communities you serve, especially when dealing with critical programs like Nutrition Security kits.
Laying the Groundwork for Warehouse Optimization
The journey starts with a hard look at your entire workflow. You need to trace every single step a product takes, from the moment it hits your receiving dock to the final scan before heading out the door. This is more than just drawing lines on a floor plan; it’s about understanding the movement, time, and resources each stage consumes.
This initial planning phase really boils down to three core actions: mapping your process, analyzing your inventory, and zoning your space.
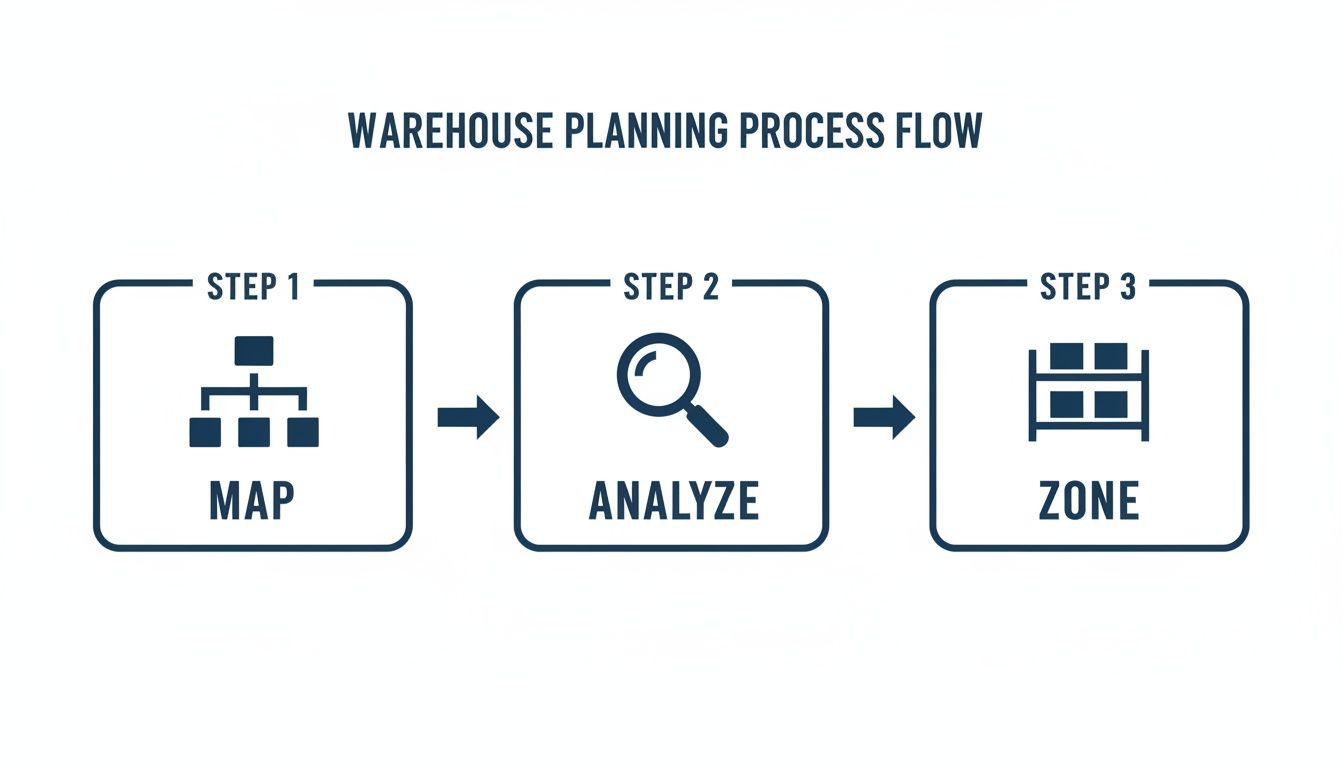
This simple Map, Analyze, and Zone approach ensures every decision is backed by data. You move from a big-picture process overview to the nitty-gritty details that define your space.
Mapping the Operational Flow
First thing's first: create a process map. Document everything. Where do pallets get unloaded? Where does quality control happen? What's the path for items going into ambient storage versus the freezer? Trace the journey for every component needed for kitting and assembly.
This kind of visual guide, which we often call a "spaghetti diagram," will immediately shine a light on cross-traffic nightmares, excessive travel times, and other hidden inefficiencies.
For example, if your team has to walk from one end of the building to grab an item for a kit, then all the way to the other end for the next part, you’ve just found a massive bottleneck. The goal here is a logical, streamlined path that cuts down on travel and handling as much as possible. Most layouts fall into U-shaped, L-shaped, or straight-through designs, and the right one depends on your volume and the building itself.
Analyzing Product Velocity and Characteristics
Next up, it’s time to dig into your data. A straightforward ABC analysis, which classifies inventory by how fast it moves, is absolutely essential.
- A-items: These are your fastest movers. They need to be stored in the most accessible spots, right near your packing and shipping zones.
- B-items: Your middle-of-the-road inventory.
- C-items: These are slow-moving items that can be tucked away in less prime real estate.
This analysis is especially critical for food programs where certain items—like milk or staple goods for multi-day kits—fly off the shelves. A key part of this is maximising space with partitioning systems to cleanly separate areas for different functions and product types.
The core principle is simple: Don't make your pickers walk a mile for your most popular items. Every single step you save is multiplied across thousands of orders, which directly impacts your throughput and labor costs.
To guide this process, we can break down the key pillars of a successful layout plan into a more structured view.
Table: Core Components of a High-Performance Warehouse Layout
This table summarizes the essential elements to consider when planning your warehouse layout, covering everything from initial flow mapping to final compliance checks.
| Component | Key Objective | Impact on Operations |
|---|---|---|
| Operational Flow Mapping | Visualize product movement to identify and eliminate inefficiencies. | Reduces travel time, minimizes bottlenecks, and streamlines handling. |
| Product Velocity Analysis | Place high-demand items in easily accessible locations. | Increases pick speed, improves order accuracy, and lowers labor costs. |
| Functional Zoning | Dedicate specific areas for distinct activities (e.g., receiving, kitting). | Enhances safety, prevents cross-contamination, and improves organization. |
| Temperature & Allergen Control | Ensure product integrity and safety through physical segregation. | Maintains compliance with FDA regulations and prevents costly recalls. |
| System Integration (WMS/EDI) | Align the physical layout with digital inventory and order management systems. | Boosts inventory accuracy, supports automation, and enables real-time tracking. |
| Regulatory Compliance | Design the layout to meet all relevant standards (FDA, Buy American, etc.). | Avoids fines, ensures program eligibility, and builds trust with partners. |
By systematically addressing each of these components, you create a layout that is not just efficient but also resilient, scalable, and fully compliant with the stringent demands of food-grade operations.
Establishing Functional Zones
With your flow mapped and inventory analyzed, you can finally start zoning your warehouse. This just means dedicating specific areas for different jobs. A well-zoned facility keeps the chaos at bay and makes everything safer and more efficient.
Key zones you’ll want to map out include:
- Receiving and Inspection
- Temperature-Controlled Storage (Ambient, Refrigerated, Frozen)
- Allergen Segregation Area
- High-Velocity Pick Zone
- Kitting and Assembly Stations
- Packing and Shipping
Look at what Amazon achieved in its fulfillment centers. By using AI-based traffic control, they managed a staggering 50% increase in storage per square foot. This optimization was projected to create $10 billion in annual savings by cutting down on travel and space needs. This is the same kind of thinking that could help a facility like Umoja Health's Woodland hub reduce its fulfillment costs by up to 40%. The potential for savings and efficiency gains is massive when you get the groundwork right.
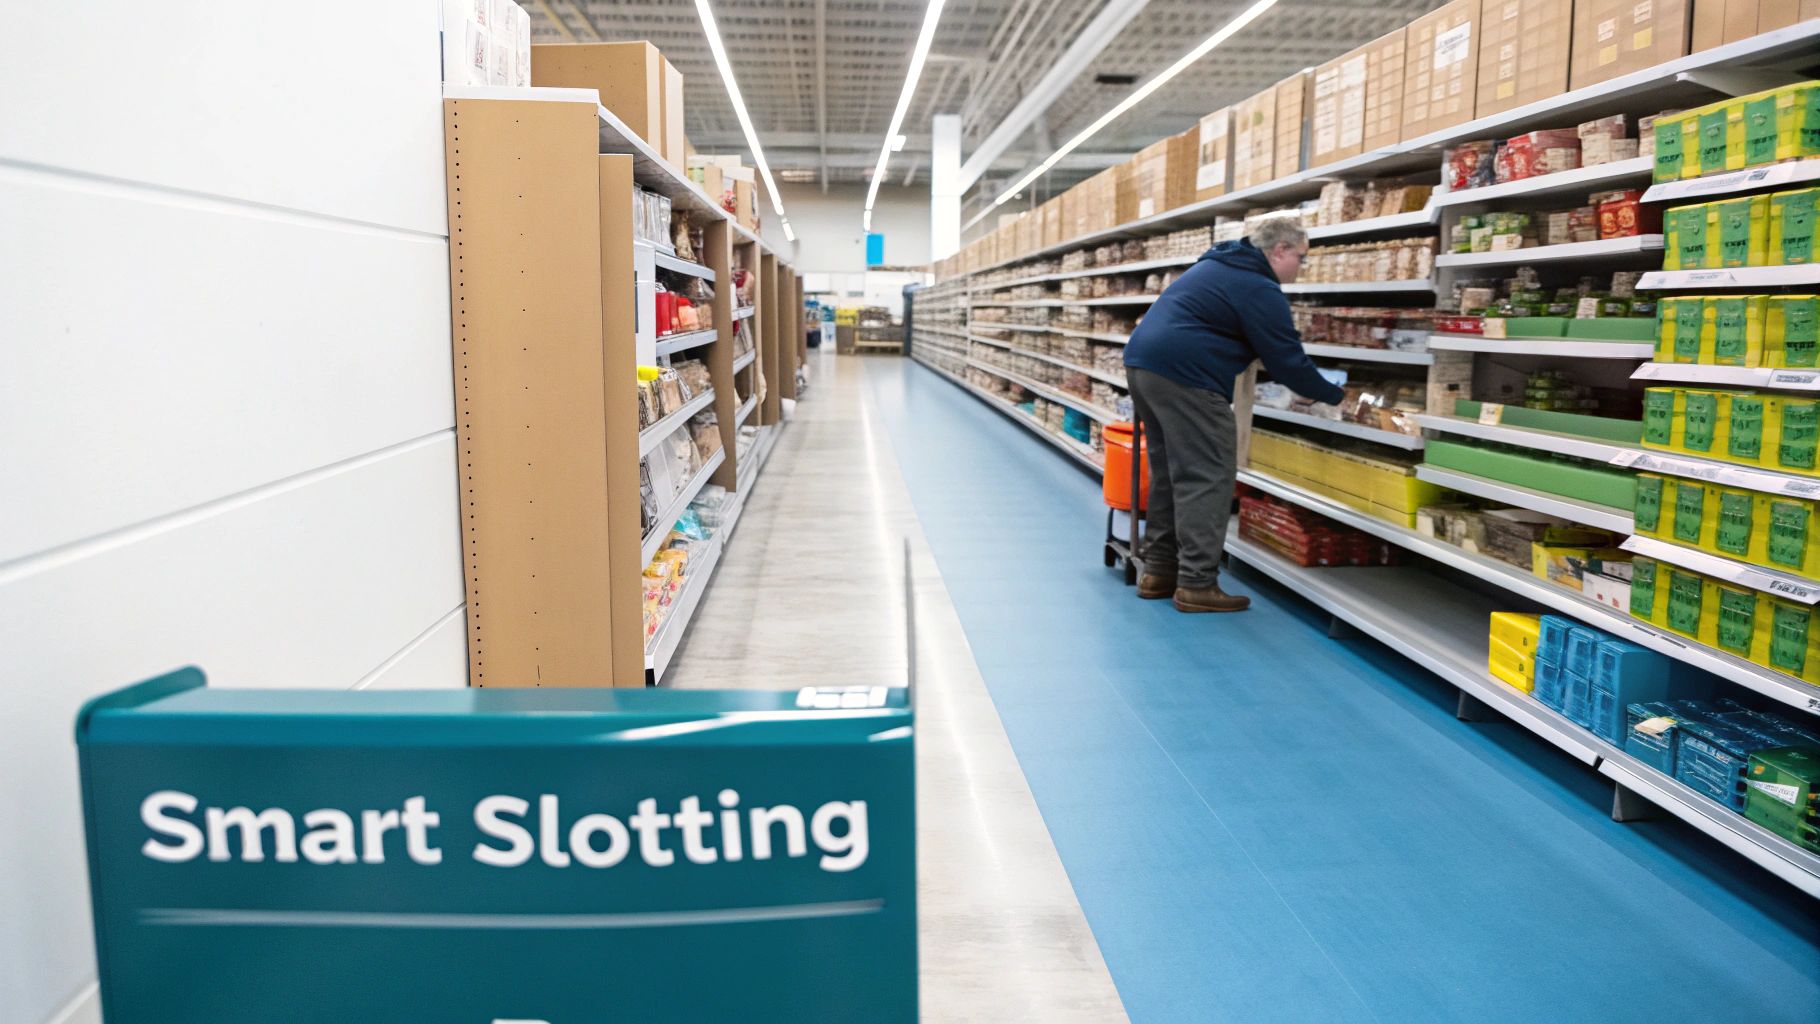
Mastering Data-Driven Slotting Strategies
If there’s one secret weapon in warehouse optimization, it’s effective slotting. This is where you turn your physical space into a high-performance engine. It's so much more than just finding an empty shelf; it's a dynamic strategy that puts the right product in the right place at the right time, all based on hard data.
Moving beyond a basic ABC analysis is where you really start to see serious efficiency gains. Instead of looking at just item velocity, a data-driven approach pulls in item dimensions, weight, and, most importantly, how items are ordered together. For the kitting operations common in food programs, this is a total game-changer.
Beyond Basic ABC Analysis
A simple ABC analysis is a fine starting point, but it barely scratches the surface. For example, it might tell you that canned corn is a fast mover. What it won't tell you is that it’s almost always ordered with canned green beans and dried pasta for multi-day meal kits.
That’s where the magic happens. Grouping these items together in a forward picking zone right near your kitting stations will dramatically cut down on picker travel time. Your team can grab all three components in one quick trip instead of zigzagging across the warehouse. I’ve seen this strategy alone slash pick times and clear up aisle congestion, creating a workflow that’s just plain intuitive for staff and volunteers.
Intelligent slotting isn’t just about making things neat; it’s about engineering efficiency into every square foot of your facility. When pickers spend less time walking, they spend more time fulfilling orders, which directly boosts your throughput.
Leveraging Data for Smarter Placement
Your Warehouse Management System (WMS) is an absolute goldmine of information for slotting. Diving into your order history helps you spot the patterns that should be shaping your layout. This data lets you answer the critical questions:
- Which SKUs are frequently ordered together? Identifying these "product families" allows you to create mini-warehouses within your main facility. This is perfect for streamlining the picking process for specific kits like disaster response boxes or diabetes-friendly grocery programs.
- What is the true velocity of each item? You have to look at seasonality. Cranberry sauce might be a C-item for most of the year, but it rockets to an A-item leading up to the holidays. Your slotting strategy has to be agile enough to keep up.
- How does product size and weight impact handling? This is a big one for safety and speed. Place heavy, bulky items on lower shelves in the "golden zone" (between the waist and shoulders) to reduce strain and improve ergonomics. Lighter, smaller items can go higher up.
To stay on top of this, you need good data flowing consistently. For those looking to get ahead of the curve, exploring concepts like mastering real-time data analytics can help you make instant adjustments based on incoming orders, keeping your layout perfectly synced with current demand.
Slotting Strategy Comparison
Choosing the right slotting strategy depends entirely on your operation's specific needs. A one-size-fits-all approach just doesn't work when you're dealing with the complexities of food program fulfillment.
This table breaks down the most common slotting methods and shows where they shine in a food program context.
| Slotting Method | Best For | Example Application |
|---|---|---|
| Velocity-Based (ABC) | Simple operations with consistent demand. | Storing fast-moving canned goods near the shipping dock. |
| Product Family Grouping | Complex kitting and multipack workflows. | Grouping all components for a "Senior Nutrition Box" together. |
| Zone Picking | High-volume facilities with diverse order profiles. | Dedicating aisles to specific programs (WIC, SFSP) to specialize picker tasks. |
| Dynamic Slotting | Operations with high seasonality or fluctuating demand. | Moving disaster-relief items to forward pick zones during hurricane season. |
Think of these strategies as tools in your toolkit. The real expertise comes from knowing which one to use for the job at hand—and sometimes, it's a combination of several.
Ultimately, mastering data-driven slotting transforms your inventory from a passive asset into an active, strategic component of your operation. By continuously analyzing your data and adapting your layout, you create a warehouse that is not only efficient but also resilient and responsive to the needs of the communities you serve.
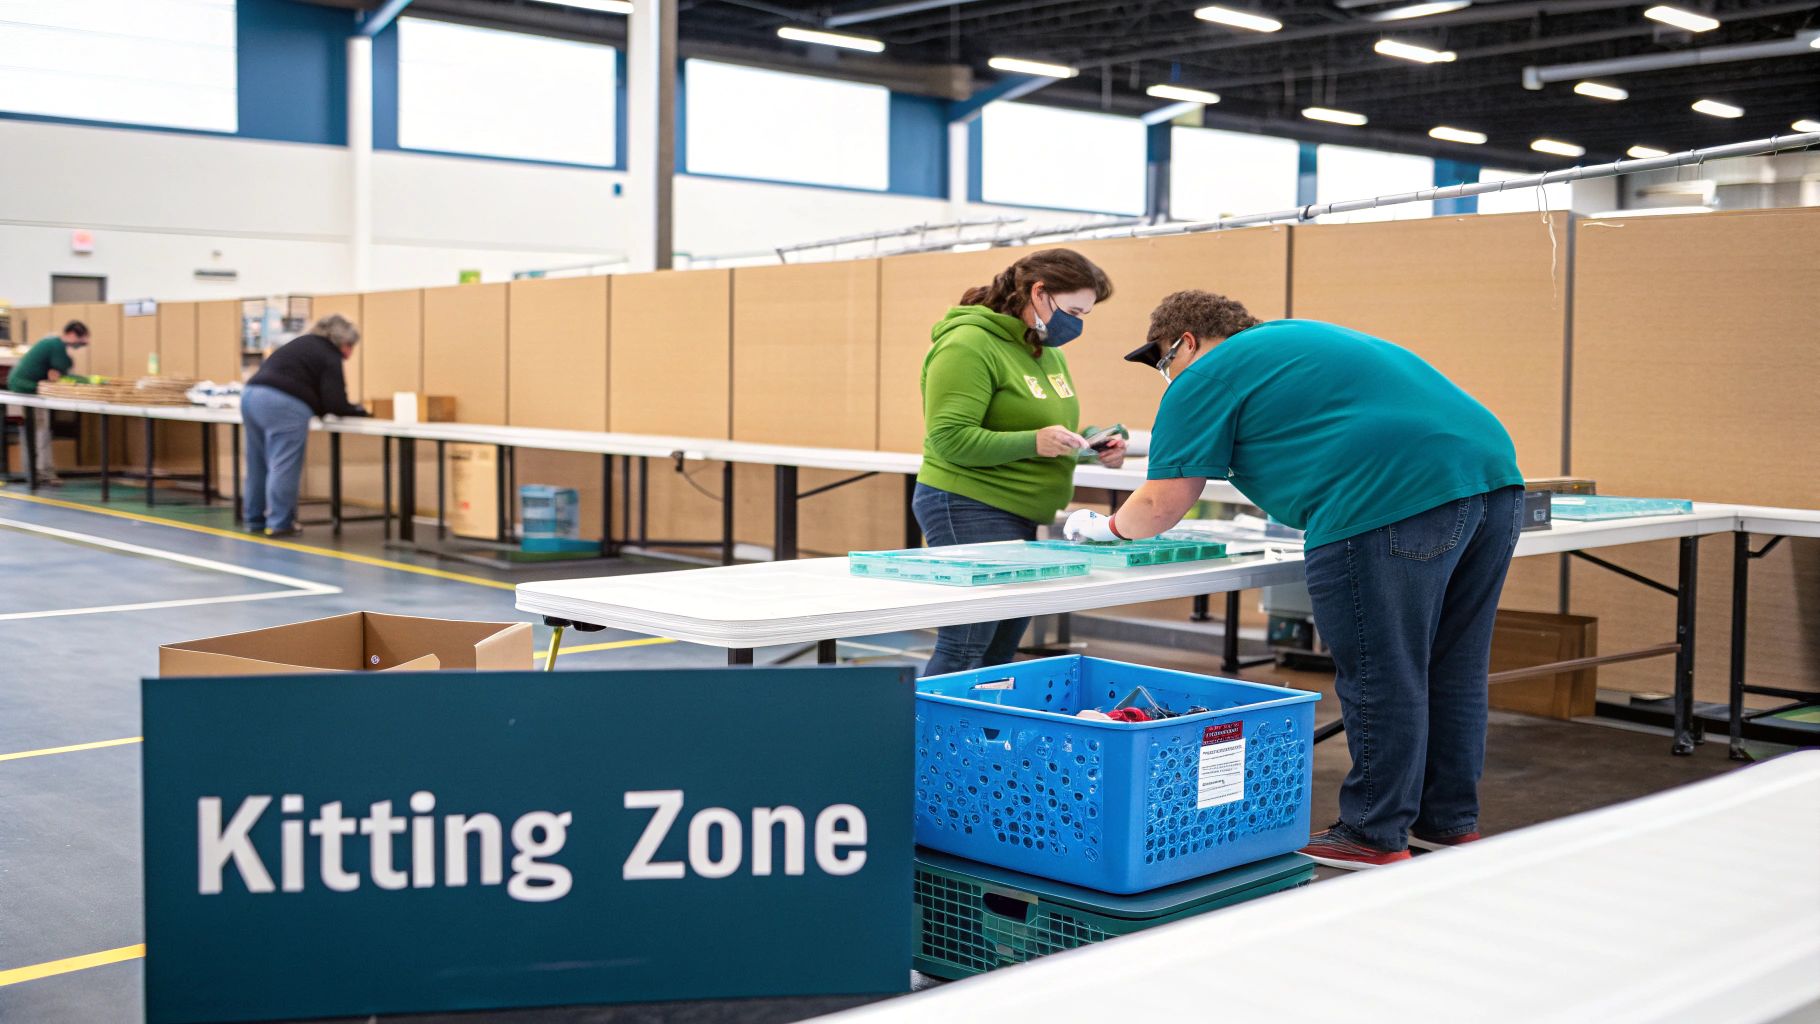
Designing Efficient Kitting and Assembly Workflows
Kitting and multipack assembly are the heart of so many food programs. Whether your team is building home delivery boxes for WIC participants or assembling multi-day meal kits for a disaster response, an inefficient process creates a bottleneck that can bring your entire operation to a grinding halt. A well-designed kitting zone isn't just a nice-to-have; it's a critical component for speed, accuracy, and scalability.
This means moving beyond simply clearing a space on the floor and setting up a few tables. True efficiency comes from a purpose-built environment that minimizes wasted motion and empowers your team—whether they're seasoned staff or first-time volunteers. The goal is to create a workflow so intuitive that it becomes second nature.
The U-Shaped Flow: A Proven Model
From my experience, one of the most effective designs for a kitting area is the U-shaped workflow. This layout is brilliant in its simplicity. It places the starting point (empty boxes, bags) and the endpoint (sealed, labeled kits) right next to each other. Components are staged along the outside of the "U," allowing assemblers to move in a logical, circular path without backtracking.
This design dramatically cuts down on wasted steps. Instead of walking back and forth across a long, linear assembly line, workers complete a short loop. This also minimizes congestion and the risk of people bumping into each other. It’s a simple concept with a powerful impact on throughput.
A well-executed U-shaped cell can boost productivity significantly, simply by keeping everything an assembler needs within arm's reach.
Ergonomics and Station Setup
Picker fatigue is a real—and costly—problem. Designing ergonomic workstations isn't just a nice gesture; it's non-negotiable for maintaining both team morale and output. Simple adjustments can make a world of difference.
Here are a few practical tips I always recommend for station design:
- Adjustable Height Tables: Not everyone is the same height. These tables prevent back strain from constant bending or reaching.
- The Golden Zone: Position the most frequently picked items between a worker's waist and shoulders. This "golden zone" requires the least amount of physical effort, reducing strain over a long shift.
- Anti-Fatigue Mats: This is a small investment that provides significant comfort for team members standing for hours. Happy feet make for a happy, productive team.
These small details add up. A comfortable worker is a more focused and productive worker, which directly translates to fewer errors and higher consistency in the final kits.
Staging Components for Peak Efficiency
How you supply your assembly lines is just as important as the line itself. You absolutely must pre-position your components, especially when working with volunteers who don't know your warehouse layout. The last thing you want is a dozen well-meaning people wandering through your aisles searching for the next product on the list.
Create a dedicated staging area directly adjacent to your kitting zone. Use pallet jacks or rolling carts to replenish components in bulk before the assembly process begins. This keeps the assembly area clean, uncluttered, and focused solely on building kits.
For more complex jobs, like those found in specialized nutrition security kitting programs, I often suggest creating "sub-kits" of dry goods ahead of time. This simplifies the final assembly, especially when you need to integrate temperature-sensitive items at the last minute.
Handling Specialized Requirements
Food program fulfillment often comes with unique challenges that have to be built into your workflow from day one. Your layout needs to account for these from the very beginning.
- Cold-Chain Integration: For kits requiring refrigerated or frozen items like milk, position your kitting zone as close to your cold storage as possible. Use insulated totes to bring items to the line in small batches, which maintains the cold chain right up to the point of packing.
- Compliance Documentation: Create a specific, dedicated station in the workflow for inserting necessary paperwork—menus, educational materials, or compliance documents. This simple step ensures 100% of packs meet program requirements.
- Quality Control: Designate the final station in your U-shaped flow for a quick quality check. This person's only job is to verify contents, ensure proper sealing, and apply the final shipping label before the kit is moved to the outbound area. It’s your last line of defense.
An optimized warehouse layout is only half the battle these days. The physical arrangement of your racks and zones has to be perfectly in sync with your digital systems. The real magic happens when your Warehouse Management System (WMS) acts as the brain, directing the physical flow of goods with precision and intelligence.
A modern WMS does more than just track inventory; it actively shapes your entire operation. It tells your team exactly where to put away new arrivals based on real-time data—how fast items are moving, historical order patterns, and what space is actually available. This kind of system-directed put-away is the first step to keeping your layout efficient over the long haul, preventing slow-moving items from accidentally hogging prime real estate.
You can really see this synergy come to life during the picking process. A well-configured WMS generates optimized pick paths, guiding workers on the most efficient route through the warehouse. It clusters picks for multiple orders to slash travel time. Your system has to be smart enough to understand your layout's zones, aisle directions, and slotting strategy to create a path that actually makes sense on the floor.
Evaluating a 3PL Partner’s Tech Stack
When you're looking to partner with a third-party logistics (3PL) provider for food-grade services, their technology is just as important as their physical infrastructure. Their WMS and Electronic Data Interchange (EDI) capabilities will directly impact your program's success and your ability to maintain compliance. Vetting their systems is simply non-negotiable.
Here’s a practical checklist I use when evaluating a potential partner:
- Real-Time Inventory Visibility: Can you log in right now and see accurate, up-to-the-minute stock levels for all your SKUs? That includes items in quarantine or on QC hold. Lagging data is a recipe for stockouts and fulfillment nightmares.
- EDI Integration: How smoothly can their system talk to yours? Ask about their specific experience integrating with government reporting portals or other platforms you rely on. Clean data flow is critical for tracking program delivery.
- Inventory-Aware Substitutions: For programs like WIC home delivery, this is huge. Can the WMS manage pre-approved substitutions if an item is out of stock? This ensures participants still get compliant orders without a hitch.
- Lot and Expiration Tracking: The system must support strict First-In, First-Out (FIFO) or First-Expired, First-Out (FEFO) logic. This is a foundational requirement for any food-grade operation to ensure safety and minimize spoilage.
- Custom Reporting: Can they build reports tailored to your program’s unique needs? Think tracking deliveries by zip code, monitoring spoilage rates, or reporting on Buy American compliance.
A 3PL’s technology should feel like an extension of your own team—transparent, responsive, and fully aligned with your mission. If their systems can't give you the data you need to run your programs effectively, they aren't the right partner.
Accessible Entry Points for Automation
Automation doesn't have to mean a multi-million dollar investment in robots. There are plenty of accessible, practical ways to start that deliver a significant return by bridging gaps in your manual workflows. The goal is to automate the repetitive, low-skill tasks to free up your people for more complex, valuable work. For organizations looking for a partner to implement these kinds of efficiencies, exploring comprehensive 3PL logistics solutions can provide a clear path forward.
One of the most effective starting points is a simple conveyor system. Placing a conveyor at the end of a kitting line can automatically move completed and sealed boxes to the shipping area. This one piece of equipment eliminates the need for staff to manually palletize kits or use carts to transport them across the facility, which reduces congestion and frees up labor.
Likewise, think about automated taping machines or label applicators at your packing stations. These tools drastically improve the speed and consistency of that final step, ensuring every box is sealed securely and labeled accurately. These small-scale automations are the building blocks of a smarter, more scalable warehouse.
Weaving Food Safety and Compliance into Your Warehouse Layout
When your mission is to serve vulnerable populations, compliance isn't just a box to check—it's the absolute foundation of everything you do. It’s a standard you build directly into your physical space from day one. When you optimize your warehouse layout, you’re creating your first and most critical line of defense for food safety and program integrity.
This goes way beyond keeping the floors clean. It’s about engineering a facility that makes following complex rules—from the FDA to specific program guidelines—the default path, not a difficult exception. A layout built for compliance makes audits smoother, keeps participants safe, and ultimately, protects your organization's mission.
Designing for FDA and Food-Grade Standards
Any operation that handles food has to start with the fundamentals of food-grade storage. The FDA has clear, non-negotiable guidelines that directly impact how you should map out your space. Your layout must be designed to shut down any possibility of cross-contamination and protect product integrity from the moment a truck backs into your dock until the final package goes out the door.
A critical first move is establishing clear, physically separate temperature zones. You can't just rope off a corner for cold items; you need dedicated, temperature-controlled environments for:
- Ambient Storage: For all your shelf-stable goods like canned foods, grains, and dry pasta.
- Refrigerated Storage: For perishable items like fresh produce or dairy, which demand precise temperature maintenance.
- Frozen Storage: For products that need deep-freeze conditions to preserve their quality and safety.
Where you put these zones is just as important as having them. Think strategically. Your refrigerated and frozen storage should be located as close as humanly possible to both your receiving and outbound shipping docks. This simple design choice is a powerful tool for maintaining the cold chain because it slashes the time these sensitive products spend in ambient temperatures.
A Proactive Stance on Allergen Segregation
Cross-contact with allergens is a massive food safety risk, and a reactive approach just won't cut it. Relying on labels alone is a recipe for disaster. Your warehouse layout has to be proactive, physically segregating common allergens like peanuts, tree nuts, soy, and wheat from everything else.
In practice, this often means creating a dedicated, physically separate storage area—think of it as a "warehouse within a warehouse." This zone needs its own set of tools, pallet jacks, and cleaning supplies to stop allergens from hitching a ride to other parts of your facility. Bold, clear signage and floor markings are essential to ensure every single person, whether staff or volunteer, understands where these boundaries are.
A well-designed layout makes the safe path the easy path. By physically separating allergens, you remove the guesswork and drastically reduce the potential for human error, which is the root cause of most cross-contact incidents.
For facilities handling a high volume of allergens, some take it a step further by installing separate ventilation systems for these segregated areas. It’s a serious commitment, but it’s a best practice that shows an uncompromising dedication to safety in high-risk environments.
Building Program Rules into Your Physical Flow
Beyond federal food safety regulations, many programs have their own unique logistical quirks that your layout must support. If you ignore them, you risk compliance failures that could jeopardize your funding and your mission. A smart layout anticipates these needs and builds the solutions right into the workflow.
Let's look at a few real-world examples:
- SFSP Parent Pick-Up: Summer Food Service Programs (SFSP) that allow parents to pick up meals need a safe and efficient flow for foot traffic. This might mean designing a completely separate entrance and a one-way loop that keeps people safely away from active forklift aisles and busy loading docks.
- Buy American Provisions: Many federal nutrition programs mandate adherence to Buy American provisions. A compliant layout handles this by creating a dedicated storage zone for domestic products, physically walled off from any imported goods. This makes inventory management a breeze and audit trails perfectly clear.
- WIC Program Needs: WIC programs often require very specific product combinations. You can design pick modules that intentionally co-locate WIC-approved cereals, juices, and infant formulas, which makes fulfilling these critical orders both faster and more accurate.
By thinking through these program-specific demands, you can optimize your warehouse layout in a way that moves beyond general efficiency and creates a space that actively propels your mission forward. The goal is to build a facility that helps ensure every person receives safe, high-quality food—a cornerstone of improving nutrition security for communities. A compliant, thoughtful layout is absolutely fundamental to making that happen.
Common Questions on Warehouse Layout Optimization
Even the best-laid plans run into questions once you start moving racks around. When you're managing food-grade inventory for complex, multi-faceted programs, you're bound to hit some unique challenges that need practical, clear-cut answers. Let's walk through some of the most common questions we hear from operators when they're redesigning their space for peak efficiency and compliance.
How Do I Balance Volunteer Kitting and Daily 3PL Operations?
The secret here is designing for flexibility. You absolutely have to create multi-purpose zones that can shift based on the day's demands. Your starting point should be a primary kitting area built with mobile packing stations and shelving that you can reconfigure on the fly for different projects.
When it's time for a large-scale volunteer event, you can expand this core area into adjacent open floor space—think of a temporarily cleared receiving dock. Use colored floor tape and clear signage to map out these temporary setups. Once the event is over, the space reverts, and your core, permanent stations for daily 3PL work remain untouched. This ensures your day-to-day fulfillment is never disrupted.
Your WMS is your best friend here. It should support dynamic location assignments, allowing you to create 'virtual' forward-picking locations specifically for high-volume kitting events. This ensures volunteers can quickly find components without needing to travel deep into your racking, maintaining efficiency for everyone.
This hybrid approach allows you to maintain operational excellence every day while still having the scalability for those short-term, high-impact volunteer projects.
What Is the First Step for Redesigning an Existing Layout?
Before you move a single rack, the most critical first step is data collection and analysis. Making physical changes based on assumptions is a recipe for costly mistakes. Your operational data, on the other hand, provides a clear roadmap.
Pull at least 6-12 months of data from your WMS and order management systems. You need to dig into a few key metrics:
- SKU Velocity: Which items are flying off the shelves, and which are collecting dust? This is the foundation of your slotting strategy.
- Order Profiles: What items are most frequently ordered together? This is absolutely crucial for creating efficient kitting zones and workflows.
- Picker Travel Paths: Where are your pickers spending the most time walking? A "spaghetti diagram" exercise, where you physically trace an order’s path through the warehouse, can be incredibly revealing.
This data-first approach ensures your new layout solves actual problems instead of creating new ones. It will immediately shine a light on your true bottlenecks and high-traffic areas, giving you the solid foundation needed for any effective layout optimization.
How Can I Better Handle Returns and Quality Control?
You need a dedicated, physically separate area for returns and quality control (QC), often called a "reverse logistics" zone. This area has to be located near your receiving docks, but it must be clearly marked off to prevent any chance of cross-contamination with your outbound goods.
The layout for this zone should have designated stations for specific tasks. Plan for an inspection area, a quarantine section for damaged or potentially unsafe products, and a disposition area where items are sorted to be returned to stock, donated, or disposed of according to strict food safety protocols.
Proper WMS integration is non-negotiable. Any item in the returns area must be placed in a specific system status, like "QC Hold," so it's not available for fulfillment until it's officially cleared. This blend of physical and digital separation is fundamental to maintaining both food safety and perfect inventory integrity. It’s a must-have in any compliant, modern food-grade facility.
At Umoja Health, we understand that a well-designed warehouse is the backbone of successful food programs. We help organizations build compliant, efficient operations from the ground up. Find out how we can support your mission at https://umojahealth.com.